Showing posts with label Home & Travel. Show all posts

Sunday, December 07, 2014

Custom Christmas Ornament


I decided to start a new tradition, partly inspired by my parents still having my "baby's first christmas 1988" ornament. This ornament tradition will be a custom ornament filled with little trinkets and a wish.

So here's how to make yours!
You will need:
1- Clear Plastic or Glass Ornament - I purchased mine at Michaels for .56 Cents
2. Sequins, jingle bells, and little trinkets to put inside the ornament
3. Glitter
4. Wood Piece, Stickers, or Die Cut piece for the year
5. Small piece of paper for your wish


I first put in a few mini jingle bells (these were purchased from Stampin' Up! years ago).
I then added snowflake sequins from Studio Calico, Gold Flat sequins from Stampin' Up! and these wooden starts which I coloured green to resemble the decorations I chose for this years tree. 
I then took a wooden piece from my card kit from Studio Calico and wrote Christmas 2014 on both sides. 

Other variations could include:
The year painted on the outside or with stickers
A die cut of your family name on the inside
Each family member adds a wish
Put the family initial on the outside in rhinestones.. there are so many ideas!


I then dumped about 2-3 tsp's of glitter. I ended up choosing a light green glitter to match my ornaments. This way if I change the accent colour of my tree yearly and remember in 2014 I chose green. Then all the years of custom ornaments on the tree after a few years would tell a story in itself!


I then wrote a "family wish". This was a goal/hope/dream we are hoping will come true before Christmas 2015. We each have personal goals, but this one was something we both wish for.


And Voila! A custom ornament, no one else in the world has!
I hope this will become a treasured memory and diary of sorts for years to come.


Hope you enjoyed, 
Please comment, subscribe by email, pin or share :)


Monday, August 18, 2014

1 Hour Summer Closet Challenge!


A few months back I challenged you all to a 5 minute organization challenge where you picked a "stubborn" spot (that seems to always get cluttered) and tackle it! To see what I organized click here.
Today I am challenging you all to tackle a little bigger of a project. A Closet. Any closet. Hallway Closet, Linen Closet, Kid's Closet, Your Closet, Sports or Craft Closet, any closet you have that needs some TLC. This is how I prepared for my 1 hour summer closet challenge.


Step 1:

Open your closet and stare at it. What do you not like about it?
What challenges for storage do you have?
What do you envision the closet looking like?
Get your mind going with ideas and maybe take notes while you look at it.

For me, the biggest challenge was that the closet had 3 boxes and in one of those boxes were 19 pairs of shoes just sitting at the bottom. (Side note: In the hallway there were 4 more pairs).
The other challenge or goal I should say that I wanted to accomplish was to find a home for my Crafting cart. 
So with this in mind I knew the 3 boxes had to go. One was hosting the shoes- I then had to find shoe storage. One box was empty! ugh! and the other was for a printer that we are using. With such a small condo- that box was going too.

Step 2:

Do some online shopping and research for suitable storage solutions in your budget. 
Ikea is a good place :)
I went to the IKEA closest to home and looked at shoe storage. I could have used a rack at the bottom but that would of taken up all of the floor space in my tiny hallway closet. Instead I knew I wanted something off the door or hanging on the rod. The two IKEA products I used are at this link. 
For $11 +tax, I found shoe storage! Yay!


Step 3:

Execution. The first thing I did was pulled all of the biggest items out first. All the boxes, and big items such as the steamer, back backs, etc. 
I then organized all the coats so that the hangers go all the same way to save space. Next, I hung my dogs hygiene/bath caddy-bag on two hangers because it is kind of heavy. I also put all the empty hangers there as well. I then opened and placed the IKEA storage solutions. I played around with the pocket system to be hanging beside the coats but it took too much space. 
Now that the floor was all cleared out, my crafting cart rolled right into the closet. I placed the clothing steamer beside it and on the other side of the cart I have a can of paint, and winter boots. My flip flops fit right under the cart :)
On the top shelf I removed the printer box and added a clear bin I already had which hosted some ink and punches. I also put on top my project life supplies and calligraphy supplies. To the left of that I stored my big shot and two backpacks. On the right is a basket that came with the home and stores condo important items and maintenance stuff. On top in the green bag is Soccer shoes and equipment.


THE RESULT


Hope you enjoyed, 
Please comment, subscribe by email, pin or share :)


Thursday, August 07, 2014

Carry On Packing for 10 Days! What Worked? What Didn't?

Hey Everyone, 

Brazil was amazing! 
but how did the packing go?

Packing for 10 days on a carry on for Brazil was the first time I travelled with solely a carry on. I didn't know if it would work out, but I had my fingers crossed and really hoped it would- and it did!


If you missed my video on how I packed see it here! My Packing Video 8 Days before leaving


What Worked:

- Pack It Cubes (Eagle Creek) these were a life saver!
If it wasn't for these cubes my stuff would 1) not fit and 2) would be all over the place and be a complete disaster. 
These cubes kept categories of items like dirty clothes, under clothes/bathing suits, shirts/pjs, bathroom accessories, travel accessories like money and my Filofax, etc.
- Clothing Folder kept all my clothes from getting wrinkled and taking up too much space, the items I chose to put in there were maxi dresses, long jeans, shorts, and light sweaters (though it did fit my bulky Lululemon sweater at one point)
- The refillable Perfume bottle was an amazing purchase I thought the $14 price tag was pricy but it still has perfume in it! I used it for like a month now. Awesome!
- Backpack, so I used a backpack for my iPad, electronics, things I needed easy access to during the flight, and my dads essentials as he didn't pack a carryon (just incase his bag was lost). 

What Didn't Work:

- My liquid limit. So I split all my liquids into two of the litre baggies they provide at the airport. I gave one to my dad in the backpack and one was with me in my carryon. I will have to slim down my liquids next time.
- Bra Holder. So this item was used once or twice, but I was never in situations where I needed it. Will I pack it next time? yes, but is it a must purchase? no. 
- Not planning for gifts or souvenirs- Visiting family who wants to send you off with gifts kinda put my in an awkward position, if it wasn't for my dad, i'd have to leave them behind.


My top 3 Tips for packing a Carry-On:


1) Wear the bulkiest items your taking to and from the airport and on the plane. I wore my sweat pants, a light sweater with a bulkier sweater on top and a rain jacket along with my running shoes. It was cold on the airplane too so that was nice to have layers.

2) Make sure your liquids all fit in the bag the airline recommends, for american airlines they limited to 1 quart size clear plastic bag. Or else you'll have to trash them (or give them to a family member)

3) Leave some space for souvenirs! you think this is a no brainer but when packing a carry on its hard to find space, so either in your handbag or in your carry on find some space for a few souvenirs BEFORE you go.


What are your tips for packing on carry on? I'd love to hear them as I probably will be going back to Brazil soon and will do it again!

FYI: Items used are on this blog post: Crafty Tuesdays = Packing Tuesdays!


Hope you enjoyed, 
Please comment, subscribe by email, pin or share :)
Thanks for reading

Sunday, July 13, 2014

Fifa's Over.. Back to Real Life

So I am back from Brazil and FIFA World Cup is over, back to real life and back to work.

Coming up on my blog:

* Studio Calico Project Life & Card Kit Review
* Thank You Cards/ Summer Birthday Cards
* Packing for Brazil (what worked, what didn't)
* My Brazil Trip
* Hair Update - Going Red Violet..


Please comment, subscribe by email, pin or share so you don't miss a beat! :)


Thursday, June 12, 2014

Carry On Packing: 8 Days before Brazil


I hope you enjoyed my Packing Tuesdays preview of what packing for my trip is going to look like. I did promise a video to show you the product along with my carry on luggage.
To see the previous post click here


most items were purchased at jet-setter.ca


Hope you enjoyed, 
Please comment, subscribe by email, pin or share :)


Tuesday, June 10, 2014

Crafty Tuesdays = Packing Tuesdays!

Hey Y'all!
Today is a packing/getting ready for my trip post. As you may or may not know I am travelling to Brazil for the world cup and to meet family on the 20th! 10 days to go!
This post is about the travel stuff I bought recently. There will be a video next week about how I packed, what I'm taking, and more. :) Stay Tuned.


jet-setter.ca is the website that I purchased all my travel essentials from- aside from my luggage which is being provided by my mom but she purchased the set from  The Shopping Channel. It is the HEYS Helio Luggage Set in white. I am going to attempt to bring 10 days of stuff in the carry on size as we are connecting flights and I DO NOT want to loose my luggage. 

Inside I am hoping to fit the following packing cube and clothing folder: these were purchased at www.jet-setter.ca and were on sale 20% off at the time of purchase.  These are the Pack It Cubes from Eagle Creek.


\

I also picked up two items that I think will be helpful. A Refillable perfume bottle. The bottom of the bottle attaches to your perfume for easy refilling. Great for the purse and travel. 


Next up I got this amazing wallet that clips on to the bra. Genius! I can put my credit card and cash for the day there, so that I don't have to carry a purse (convenient) and a purse could be easily stolen off my shoulder as well. Silk Undercover Bra Stash. 


Next week I will be posting a video! woohoo! on my luggage bag, what I'm packing and you will be able to see these items on video!
I also purchased a few items on OldNavy.ca at 20% off too! So nice to get new summer clothes for a trip.


Hope you enjoyed, 
Please comment, subscribe by email, pin or share :)


Disclaimer: Jet-Setter.ca did not sponsor this post nor did they ask me to advertise for them. Just wanted to share where I bought my travel gear purchased with my own money.

Wednesday, May 14, 2014

Celebrating 50! Secret Party Planning


My Mom just celebrated turning 50. I decided to throw her a surprise birthday party.
I wanted to share with you the theme, decorations I made and the do's and don'ts I learned from party planning. 

The theme was A Formal Night in Paris. Thou this theme was not as strong as I would of liked it to be but more on that later. 
The dress code was black and white formal and I was hoping birthday girl would show up in red. Unfortunately she did not own anything fancy in red, little pink accents on her shirt worked too.


For the Eiffel Tower and Roses I used the Silhouette SD. 

Cardstock Used:
Real Red Stampin Up! Card Stock
Glimmer Paper- Silver Stampin Up!
Soft Gray? Stampin Up!

Shapes Used:
Rolled Rose
3D Samantha Walker Eiffel Tower
Scalloped Circle and Circle Punch - Stampin' Up!


I used this youtube video to create the roses because I was so confused on how to make it!
Below are some photos of the decorations of my Aunts home who was kind enough to host. 
I purchased decorations at Party City. 


The Do's and Don'ts of Secret Party Planning:

Do's:
  - Have a partner to help DO NOT TRY TO DO IT ON YOUR OWN
(it also helps if this partner is in a different household than your birthday girl/guy)
- Give yourself LOTS of time (4+ weeks) to invite guests, plan details, order food/plan meals
- Know your birthday person very well and choose a theme or favourite colour that they will love (my moms favourite colour was Red and her dream is to go to Paris)
- Ensure all guests get the dress code memo and verify with them what they have to wear

Don'ts: 
- Do not leave event tasks to just anyone.
Ensure they are in the country, have time to help, and are willing!
- Change the theme or original ideas, everyone will have opinions and its very easy to loose time and money switching plans around
- Of course, do not tell the birthday girl :)


I brought my Hue Light System to my aunts house so that I could make the living room into a dance party in the evening. During the dinner portion of the event I kept the lights to a red to complement the colour scheme.


Hope you enjoyed, 
Please comment, subscribe by email, pin or share :)

Thursday, April 17, 2014

April Bark Box


      Excerpts from the bark box card included in the box:
Spring has sprung, BarkBoxers:
Time to get outside!

"This month calls for canines and humans to head for the hills and take a hike!
Whether it's a casual stroll along rolling meadows or trekking up inclines so steep they'll make any pup pant, there are base tans to build (per our most lazily carefree pup scribers, sunbathing counts as an outdoor activity), wildflowers to sniff, and trails full of wild critters to chase. We're certain that BarkBoxers are up for the challenge!
Even after the sun sets and it's time to set up shelter, we've packed some of our favourite all-natural goodies for your pup to enjoy around the campfire. So get off the couch and prep those daypacks- nature beckons!" - BarkBox


Inside this month's BarkBox:

Quaker Pet Group .com
The Pink Elephant Toy

Complete Natural Nutrition.com
Off-Leash Treats (CANADIAN!)

Etta Says .com
Duck Treats

Mr.Barksmith's .com
Carrot Cake Smoothie (Can't wait for Dash to have this on a hot day)
You put it in the freezer and its lickable cold popsicle! 

Barkworthies.com
Dash isn't a huge fan of these, but sometimes he'll chew on them!

---------

Get your BarkBox Here and BarkBox will donate a box to puppies in a shelter.


Hope you enjoyed, 
Please comment, subscribe by email, pin or share :)


Friday, April 04, 2014

Condo Craft Organization Part 2


If you haven't seen Part 1 Click Here


Having a tiny condo means having no space- for anything really. So how does a crafter survive? You have to be creative and make the most of the space you have and shrink what you can. Introducing CraftMates Lockables. I ordered mine from Amazon with free shipping! Yes! and at $24 it was a decent price. Now you can get these individual rows on their own for like $9? 


 So this is how it works. Each row is removable. Each container is individually locked. Perfect for the klutzy or messy crafter (like me). You just click the purple button on the side of the row and it "unlocks" the containers, pick one to top and release the button. Then all are still locked except for the ones that are open. To close- push the button and close the container. Easy Peasy!
So far I have used three rows but thats because most of my embellishments aren't even here! They are in storage. Yikes. So far I have organized by type of embellishment, but as I fill it up I will do by colour. First row: Brads, Second Row: Buttons, Third Row: Misc Embellishments like jingle bells and vintage keys.


I saw this product in a youtube video but was never told what it was! I finally found it and I love the concept. Let me know in the comments below how you store your small embellishments. 
If you liked this post also pin, tweet, share, and subscribe via email!

Thank you for your support and I hope you enjoyed!


Saturday, March 29, 2014

Blogging on a Schedule?

Blogging can be random or planned, depends on what kind of blogger you are. So far up till this point I have been blogging pretty randomly but I noticed I haven't posted in 9 days. I've been working on a few posts but they aren't ready to be posted- they need pics and more information. So I am kicking myself into a more organized blogging pattern and will be posting on a more regular schedule.

So here is my plan:

- Crafty Tuesdays- Post something creative and crafty every Tuesday.
- Motivation Fridays - Anything home/beauty/life organization will be posted Fridays.
- Posts related to Pet and Food will continue to blog unplanned. I will blog as it comes along and I want to share.

This way, the plan gives me some kind of motivation to post more regularly for you guys :)

So this tuesday I will be posting some birthday card designs as my boyfriends birthday is March 30th.

Make sure you subscribe via email, share on Facebook or pin your favourite posts :) 

Thanks for reading!


Friday, March 28, 2014

Spring Computer Cleaning


Is your computer making you feel unorganized? 

Is it visually cluttered? 

1 - Empty your trash


This may sound like a no-brainer but many people dump files into the trash and just let them sit there. Go through the files, double check that you don't need them, then delete them. If your not sure if you will need them in the future (BackUp or DumpIt see #5).


2 - Organize your Downloads folder


On a mac, this folder is constantly being added to but hardly emptied. Its a catch all for all your downloaded files from emails and the internet. I like to organize my downloads folder by opening two finder windows (or two my computer windows if your on a PC and your downloads go to your desktop) then I pull up my documents folder on the one window and the downloads on the other. I then go through each file and drag and drop to the appropriate categories. I make folders for each category like work, home, blog, pet etc. If I don't want the file, I will drag it to the trash.

3 - Clear out your desktop and add a cute background


Having a clear desktop makes it really easy to see what your doing, it also helps the computer boot up faster because its not thinking about all the junk on the desktop that it has to load! Huh! who knew?
Sometimes I do have a folder on the desktop that is specific to a project I am currently working on. I then will file that folder away into Documents if I want to keep it or to Downloads if I may want to delete it later. The background is from Cuptakes (which I reviewed on my blog) Its cute and functional with the current month calendar.

4 - "Zero" out your inbox or close to it


Now this term is new. Its just another way of saying you have an empty inbox. As I write this blog post I have 2500 emails collectively in three different inboxes (after finishing this blog post I'm at 200). For some this is going to be a very daunting task. For others it may be easy. Depends on how attached you are to your emails hehe.

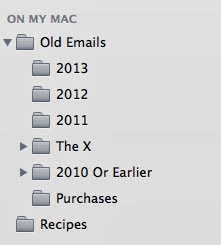
So the first thing I do is create folders on the side by year. I then go to my inbox and sort by year (you may be surprised how old some emails are in your inbox). I then highlight all the "2012" and drag it to the 2012 folder. This may take a little bit of time. I then go to the oldest (by year) folder I created and sort by who its from. If you have a lot of junk, you will notice batches of "Michaels Coupons" or "Victoria Secret Sale". I then do a mass delete of these types of emails. The emails I have left are usually from family and friends or important business type emails. Go through all the years until you are up to date. You could do a few folders for the current year like Personal, Business/Work related, Kids, etc. and then drag that into a year folder when we say hello to 2015. Depending on the mail application or web interface you are using this whole process could be very easy or very difficult. Make sure if you are choosing to file these emails off the email server (stored locally) that you back up your computer.

5 -  Back-Up your data (or DumpIt)


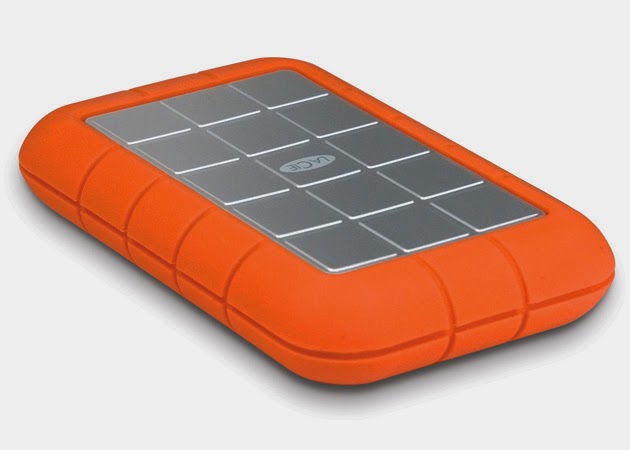
So theres two ways I have organized "old" data. My current computer has a tiny hard drive and I don't really wanna carry around pictures of me with pink hair from my high school days. So there are two ways I deal with the old data that doesn't involve deleting. The first is that I back up my whole computer. I have multiple back ups as well. You can do a backup with the software that comes with your mac or manually if your on a pc. I also "DumpIt". I am naming this technique the dump because I simply just dump old stuff onto a hard drive or USB and store it in a drawer at home (or if you're paranoid you can put it in a safety deposit box at the bank). You could organize this data by year/date or by type of data (photos,docs, etc).


Hope this has inspired you to get more organized on your computer!
Please Share, Pin and subscribe via email to make sure you don't miss a post ;)


SITE DESIGN BY DESIGNER BLOGS